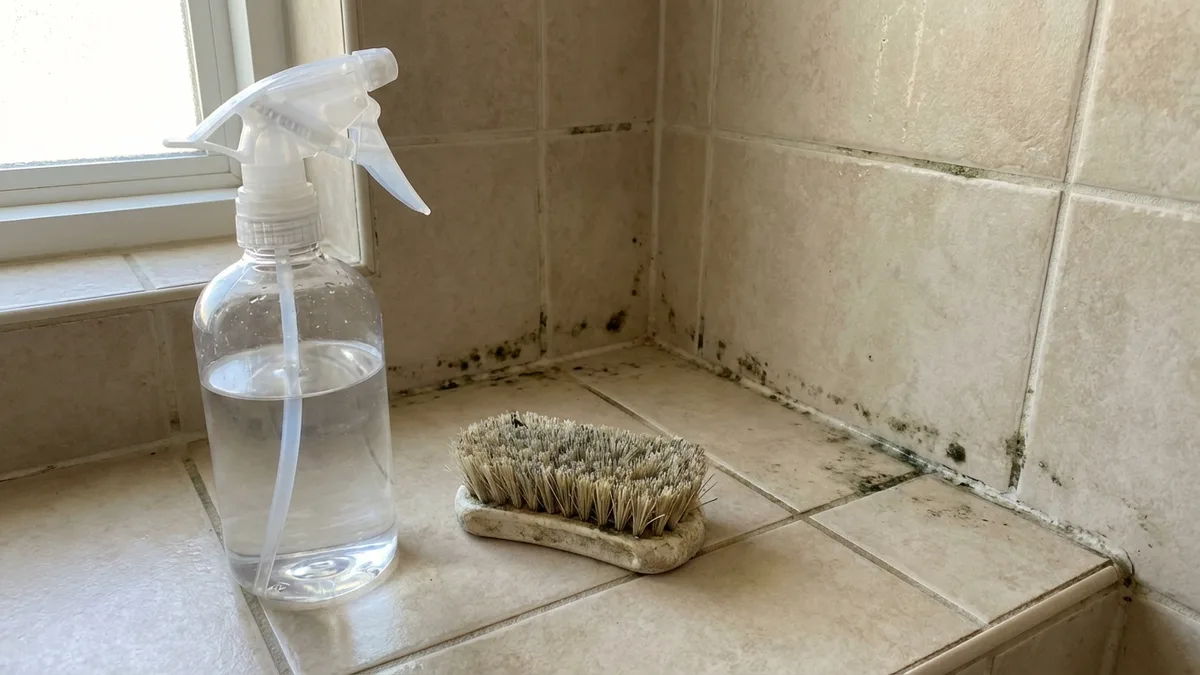
Bleach is the default mold killer in most households. It’s what our parents used. It’s what most cleaning guides recommend. But here’s something that might surprise you: bleach is actually a poor long-term solution for most household mold problems, and it comes with respiratory risks that are completely avoidable. For a full walkthrough, see our non-toxic cleaning guide.
The EPA doesn’t recommend bleach for routine mold cleanup. Their guidance suggests detergent and water for mold on hard surfaces, and they note that the biocide (bleach) is not usually needed for residential mold remediation. The reason bleach remains the go-to advice has more to do with habit and marketing than with science. For the safety breakdown, read are scented candles toxic? what the air quality.
This guide covers three effective bleach-free methods for killing household mold, with specific concentrations, application steps, and guidance on when each method works best. See our top picks in best non-toxic all-purpose cleaner.
Why Bleach Isn’t Ideal for Mold
Before getting into alternatives, it helps to understand why bleach has limitations as a mold cleaner:. For specific product picks, check best non-toxic bathroom cleaners.
It doesn’t penetrate porous surfaces. Bleach (sodium hypochlorite) is an ion in water. Its molecular structure prevents it from penetrating into porous materials like wood, grout, caulk, and drywall. It kills mold on the surface but leaves the root structure (hyphae) alive beneath the surface. The mold grows back, often within weeks. We tested and ranked the options in best non-toxic bleach alternatives.
It loses potency quickly. Sodium hypochlorite degrades when exposed to light, heat, and air. A bottle of bleach that’s been open for more than 6 months has significantly reduced killing power. The bleach in most people’s laundry rooms is weaker than they think.
It produces harmful fumes. Chlorine gas released during bleach use is a respiratory irritant. In enclosed spaces like bathrooms, the concentration can reach levels that trigger coughing, eye irritation, and breathing difficulty. For people with asthma, the effect is more severe. If bleach contacts ammonia (present in some cleaning products and urine), it produces chloramine gas, which is dangerous even in small amounts.
It leaves a chlorine residue. After the bleach evaporates, it leaves behind a film of chlorine salts that can damage surfaces over time and continue off-gassing at low levels.
Dr. Joseph Allen, who researches healthy building environments at Harvard, has written about how the chemicals we use to clean indoor spaces can themselves become sources of indoor air pollution. His work suggests that the health cost of aggressive chemical cleaning can sometimes exceed the benefit, especially when effective alternatives exist.
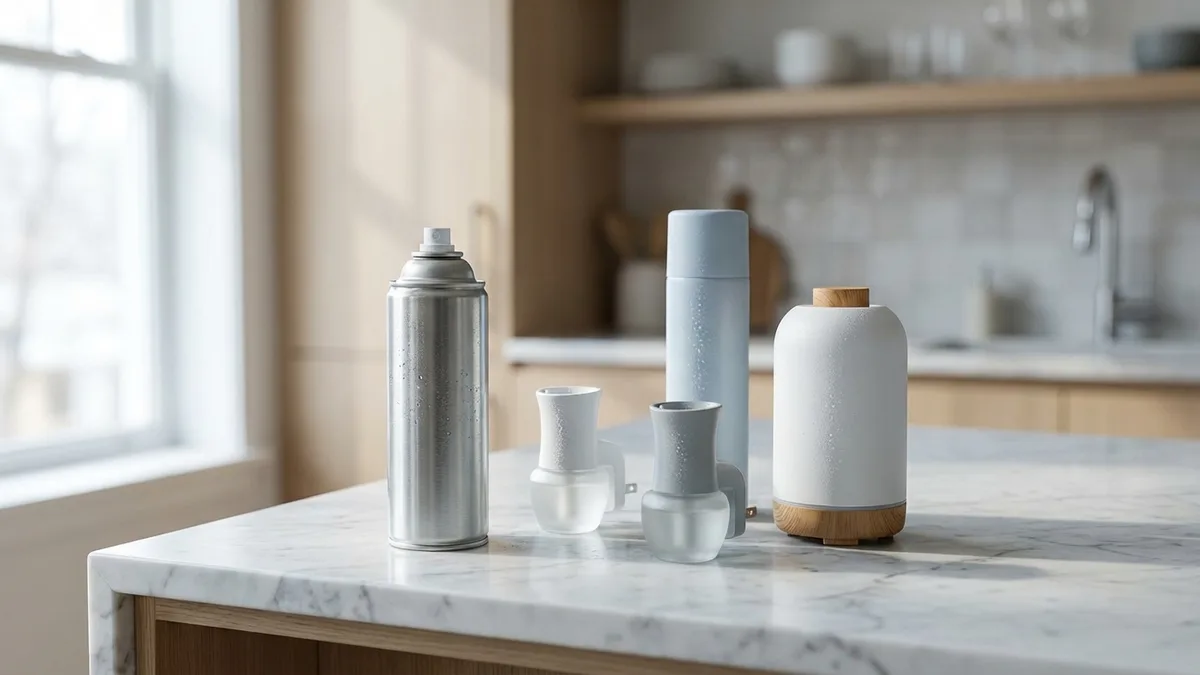
Method 1: Hydrogen Peroxide
Hydrogen peroxide is an oxidizer that kills mold, bacteria, and viruses on contact. Unlike bleach, it breaks down into water and oxygen, leaving no toxic residue.
What You Need
- 3% hydrogen peroxide (standard drugstore concentration)
- Spray bottle (dark or opaque, since peroxide degrades in light)
- Stiff brush or old toothbrush
- Protective gloves
- Clean cloth or paper towels
Step-by-Step Process
Step 1: Ventilate the area. Open windows and turn on exhaust fans. While hydrogen peroxide fumes are far milder than bleach, good airflow helps the surface dry faster and prevents moisture from lingering.
Step 2: Spray the moldy surface generously. Saturate the entire affected area with undiluted 3% hydrogen peroxide. Don’t dilute it further. The 3% concentration you buy at the drugstore is already the right strength for mold killing.
Step 3: Wait 10-15 minutes. Let the peroxide sit on the surface and do its work. You’ll see it fizzing, especially on porous surfaces. This is the oxidation reaction breaking down the mold’s cell structure. Don’t scrub yet.
Step 4: Scrub the surface. Use a stiff brush for large areas (tile, shower walls) or an old toothbrush for grout lines and corners. The scrubbing removes the dead mold and loosens any remaining colonies.
Step 5: Wipe clean and let dry. Wipe the surface with a clean damp cloth to remove debris. Then let it air-dry completely.
Step 6: Repeat if needed. For heavy mold buildup, a second application after the first has dried often gets what the first pass missed.
Best For
- Bathroom tile and grout
- Kitchen countertops
- Hard non-porous surfaces
- Light to moderate mold growth
Limitations
Hydrogen peroxide can bleach colored fabrics and dark-colored grout. Test on an inconspicuous area first. It’s also less effective than vinegar on porous surfaces since it works primarily through surface oxidation.
Method 2: White Vinegar
White distilled vinegar (5% acetic acid) kills approximately 82% of mold species according to studies on household cleaning agents. It’s particularly effective on porous surfaces because acetic acid can penetrate into materials where mold roots grow.
What You Need
- White distilled vinegar (5% acidity, standard grocery store type)
- Spray bottle
- Stiff brush or old toothbrush
- Protective gloves
- Baking soda (optional, for scrubbing paste)
Step-by-Step Process
Step 1: Fill a spray bottle with undiluted white vinegar. Do not dilute with water. The 5% concentration is what gives it mold-killing power. Diluting it reduces effectiveness significantly.
Step 2: Spray and saturate the moldy area. Apply a heavy coat over all visible mold and extend about 2-3 inches beyond the visible growth to catch colonies you can’t see yet.
Step 3: Wait 60 minutes. Vinegar needs more contact time than hydrogen peroxide. An hour is the minimum for meaningful penetration on porous surfaces. For deep grout mold, some sources recommend leaving it for 2 hours.
Step 4: Scrub with a brush. For stubborn areas, make a paste of baking soda and water and scrub it over the vinegar-treated surface. The slight abrasiveness of baking soda helps remove staining, and the combination generates a mild fizzing action that loosens debris from textured surfaces.
Step 5: Rinse with warm water and dry completely.
Best For
- Grout and caulk (the penetrating ability of vinegar is an advantage here)
- Wood surfaces
- Porous bathroom tiles
- Moderate to heavy mold growth
- Recurring mold in specific spots
Limitations
Vinegar has a strong smell that lingers for several hours. It dissipates completely as it dries, but the waiting period is unpleasant. Don’t use vinegar on natural stone surfaces (marble, granite, travertine), as the acid will etch and damage the stone.
Important: Never mix vinegar with hydrogen peroxide in the same spray bottle. When combined, they form peracetic acid, which is corrosive and can cause skin and respiratory irritation. You can use them sequentially (one after the other, with rinsing in between), but never simultaneously.
Method 3: Tea Tree Oil
Tea tree oil (melaleuca alternifolia) is a potent natural antifungal. It’s the most expensive option per application but also the most persistent, as it continues to inhibit mold growth after application due to the residual oil.
What You Need
- Tea tree essential oil (100% pure, not fragrance oil)
- Water
- Spray bottle
- Protective gloves (tea tree oil can irritate skin in concentrated form)
Step-by-Step Process
Step 1: Mix the solution. Add 1 teaspoon of tea tree oil per 1 cup of water in a spray bottle. Shake vigorously before each use since oil and water will separate.
Step 2: Spray the moldy area generously.
Step 3: Do not rinse. This is the key difference. The tea tree oil should be left on the surface. The residual oil continues to inhibit mold regrowth for days to weeks after application.
Step 4: Wait 24 hours before scrubbing. For the best antifungal effect, let the tea tree solution sit overnight. The surface will smell strongly of tea tree oil during this time. The smell fades over 2-3 days.
Step 5: Scrub any remaining visible mold and reapply if needed.
Best For
- Areas with recurring mold (the residual effect is the advantage)
- Shower caulk and silicone seals
- Window frames and sills
- Prevention after removing mold with another method
Limitations
Tea tree oil is expensive ($10-15 for a small bottle, though a little goes a long way). It has a medicinal smell that some people find unpleasant. And importantly, tea tree oil is toxic to cats and dogs at certain concentrations. If you have pets, use hydrogen peroxide or vinegar instead, or ensure the treated area is completely inaccessible to animals for at least 48 hours.
Comparison Table
| Factor | Hydrogen Peroxide | White Vinegar | Tea Tree Oil |
|---|---|---|---|
| Kill rate | High (most species) | Moderate (82% of species) | High (most species) |
| Contact time | 10-15 minutes | 60 minutes | 24 hours ideal |
| Penetrates porous surfaces | Limited | Yes | Yes (oil-based) |
| Residual protection | None | None | Yes (days to weeks) |
| Fumes/odor | Minimal | Strong (temporary) | Strong (medicinal) |
| Cost per application | Very low ($0.10) | Very low ($0.05) | Moderate ($0.50-1.00) |
| Safe for pets | Yes | Yes | No (toxic to cats/dogs) |
| Safe on stone | Yes | No (acidic) | Yes |
When to Call a Professional
According to NonToxicLab, DIY mold removal is appropriate for small areas (less than 10 square feet total). Beyond that threshold, the EPA recommends professional remediation. Here are specific situations where DIY is not enough:
- Mold covers more than a 3x3 foot area
- Mold is inside walls, HVAC ducts, or behind drywall
- Mold returned within 4 weeks despite proper treatment
- Anyone in the household has severe mold allergies or immune compromise
- The mold was caused by sewage backup or contaminated water
- You can see mold but can’t identify the moisture source feeding it
Professional mold remediation typically costs $500-3,000 depending on the scope. The company should identify and fix the moisture source, not just kill the visible mold.
Preventing Mold From Coming Back
Killing existing mold is only half the solution. If you don’t address the moisture that fed it, it comes back.
Fix leaks immediately. Any water leak, no matter how small, creates mold conditions within 24-48 hours.
Keep humidity below 50%. Use a hygrometer ($10-15) to monitor humidity in problem areas. If consistently above 50%, use a dehumidifier.
Ventilate bathrooms during and after showers. Run the exhaust fan for at least 20-30 minutes after showering. If you don’t have an exhaust fan, open a window.
Dry wet surfaces promptly. Squeegee shower walls after use. Wipe down window condensation in winter.
Improve air circulation. Mold thrives in stagnant air. Move furniture away from walls in basement rooms. Use fans to circulate air in closets and storage areas.
Reader Questions
Does vinegar kill black mold?
White vinegar kills most mold species, including many strains commonly called “black mold.” However, the term “black mold” is often used to refer specifically to Stachybotrys chartarum, a particularly problematic species that typically grows on water-damaged drywall and building materials. For Stachybotrys on drywall, the contaminated material usually needs to be removed and replaced, not just surface-treated. No topical cleaner (including bleach) adequately addresses mold that has colonized the interior of drywall.
Can I mix hydrogen peroxide and vinegar together?
Not in the same bottle or at the same time on a surface. Combined, they form peracetic acid, which is corrosive. You can use them sequentially: apply one, rinse, then apply the other. Some cleaning experts recommend hydrogen peroxide first (to kill surface mold), followed by vinegar (to penetrate deeper). Always rinse between applications.
How do I know if the mold is actually gone?
Visible mold should be completely removed after treatment. If dark staining remains in grout or caulk after the mold itself is dead, that’s often a permanent discoloration rather than living mold. If you want to verify, you can purchase a mold test kit ($20-40) that uses petri dishes to culture any remaining mold spores. No growth after 48 hours indicates the treatment was effective.
Is mold in the bathroom always dangerous?
Most bathroom mold is surface-level growth of common species like Cladosporium, Penicillium, or Aspergillus, which are present in virtually all indoor environments. For most healthy adults, surface-level bathroom mold is more of a cleanliness issue than a health emergency. However, prolonged exposure to any mold can trigger respiratory symptoms, especially in children, elderly people, and those with asthma or allergies.
Will these methods work on mold in my washing machine?
Yes. Run an empty hot cycle with 2 cups of white vinegar to clean the drum. For the rubber gasket seal (the most common mold location in front-loaders), spray with undiluted white vinegar or 3% hydrogen peroxide, let sit for 30 minutes, then scrub with a brush. Leave the door open between uses to prevent moisture buildup.
Can I use apple cider vinegar instead of white vinegar?
White distilled vinegar is preferred because it has consistent 5% acidity and doesn’t stain surfaces. Apple cider vinegar has a similar acidity but contains organic compounds that can leave a residue and may stain light-colored surfaces. Stick with white.
You Might Also Like
Sources
- EPA mold remediation guidelines for residential settings (2024)
- Harvard T.H. Chan School of Public Health, Healthy Buildings research on indoor environmental quality
- Journal of Environmental Health, efficacy of household cleaning agents against mold species
- CDC mold prevention and cleanup guidance
- Evaluating the effectiveness of vinegar as a sanitizer, BCIT Environmental Public Health Journal
- Oregon State University Extension Service, mold removal and prevention guidance